Meats and Sausages
Concrete Block Smoker
An excellent smoker can be built in no time by using standard 8”x 8” x 16” concrete blocks. A firm support base is required and square patio stones of 12”, 16”, or 18” that are available at garden centers can be successfully used. Even bigger prefabricated concrete slabs 30” x 30” that are used to support outside air-conditioning heat pumps are commonly available in warehouses with building supplies. They may make an installation look prettier but are not neccessary, a bare ground is fine. Just grade it well so it is levelled.
The construction does not include using mortar, just arranging blocks in the manner that will be most practical and a separate fire pit built from blocks is provided. This way the entire smoking chamber can be utilized for smoking meats and the entire process will be easy to control and more enjoyable. Nothing stops you from using mortar and making it a permanent structure but a strong suggestion will be to try it out a few times and make some observations that may help you with any future decisions regarding building a permanent smoker.

Easy to build concrete block smoker
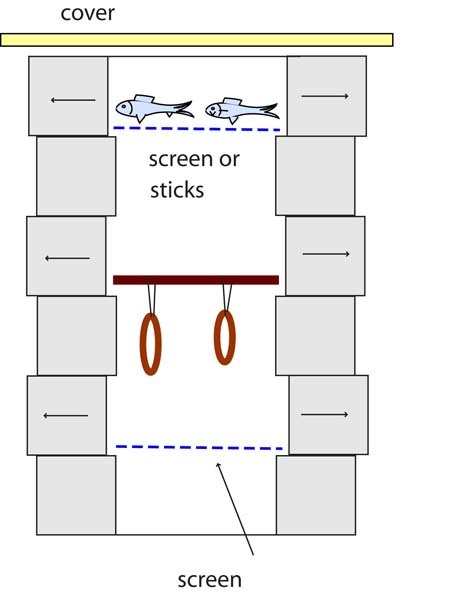
Smoking chamber
This is a totally flexible design and imagine that you are building a smoker like a child who is erecting a house using little building blocks. This is how this smoker is built and the only difference is that our concrete blocks are slightly bigger: 8’’ x 8” x 16”. The needed materials are available from a building supply store and the final cost will be incredibly low.
Smoke sticks support
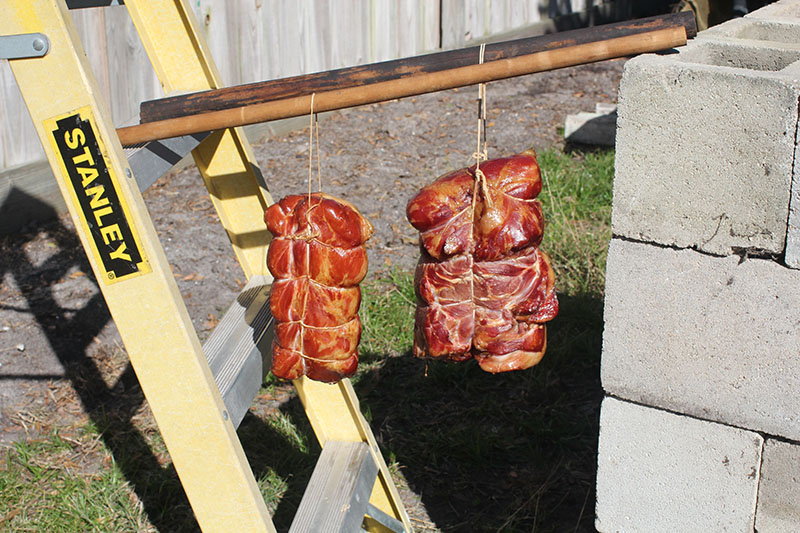
The easiest and fastest way to support the smoke sticks (not the screens) is to place them directly on the top of the smoker. The sticks should be 1” in diameter as they act as spacers now, separating the top of the smoker from the cardboard or wooden cover that rests on it. This creates an ample space for the smoke to exit from the smoker. This also limits us to two smoke sticks (one level). An old potatoe burlap sack has been used for that purpose for hundreds of years. Of course a flattened piece of cardboard or a piece of plywood can be used as well.
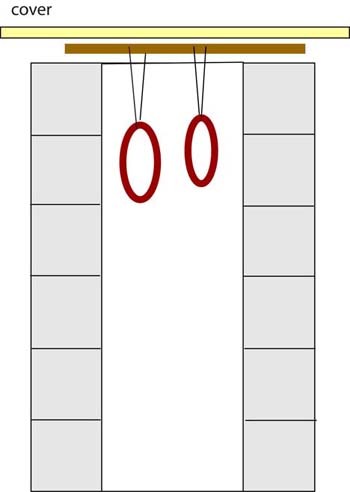
Smoke sticks on top of the smoker
Smoke sticks on protruding blocks
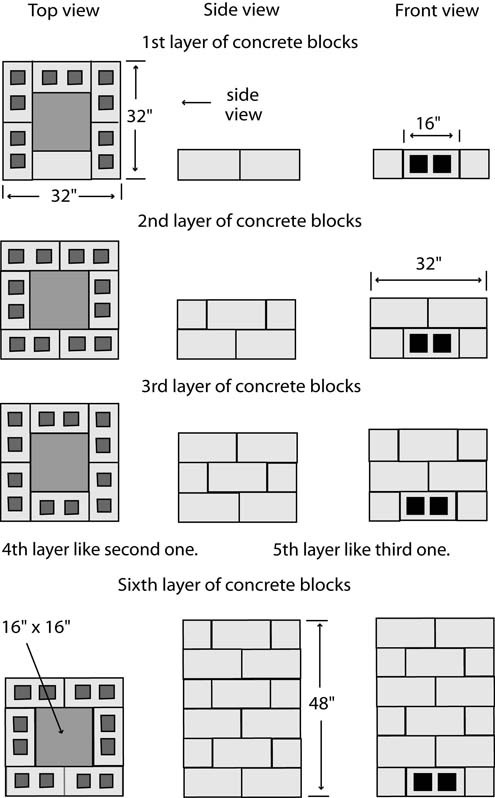
Top side and front views
Construction Details
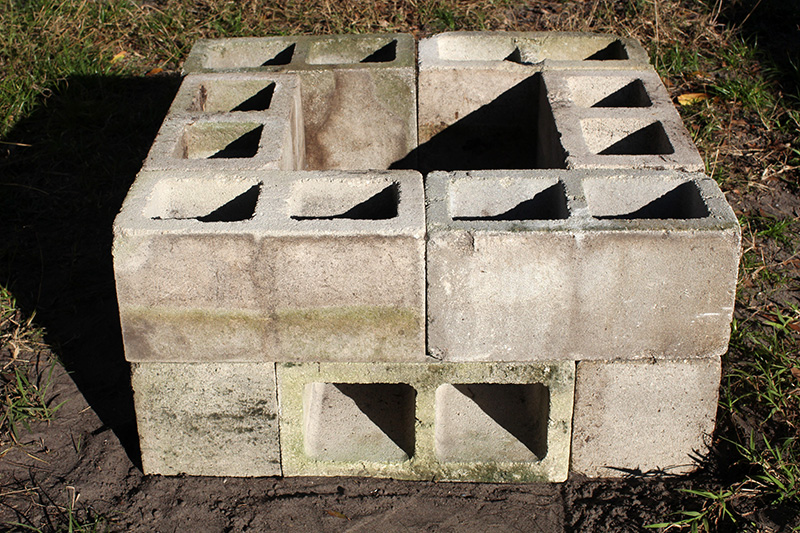
The block laying style repeats itself, uneven layers 1, 3, 5 have one pattern, even layers 2, 4, 6 have another one. There are 5 blocks in #1 level, all others require 6 blocks. In a six floor configuration a total of 36 blocks are used for the smoker and 7 blocks for the fire pit. Neither masonry bricks, mortar, half blocks or any tools are needed. As the fire pit is on the same plane as the smoker, in order to achieve enough draft, the smoker is built of six floors and is 48" high which makes it a comfortable height to work with. It will also work if the height is limited to 5 block levels (40") and if more draft is needed, an extra floor can be added in a matter of minutes. The blocks can be spaced so that every other row can have two blocks projecting inward from the wall on each side of the smoker. This arrangement creates support for the smokesticks, screens or racks.
Fire Pit
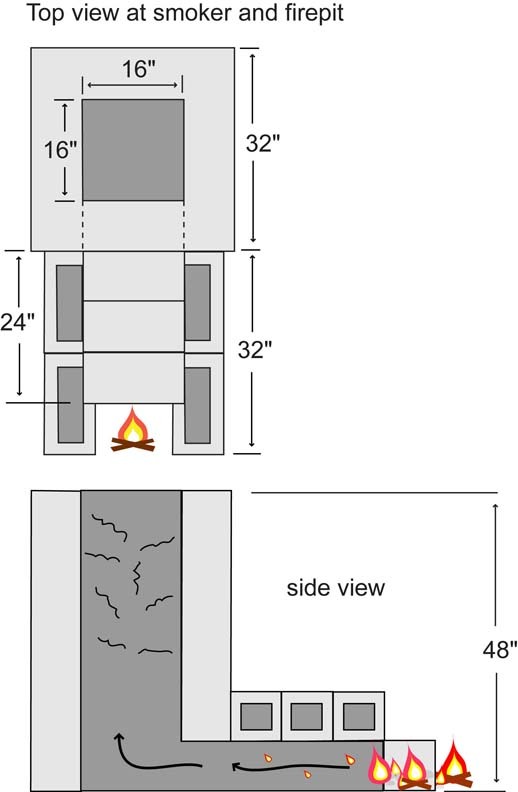
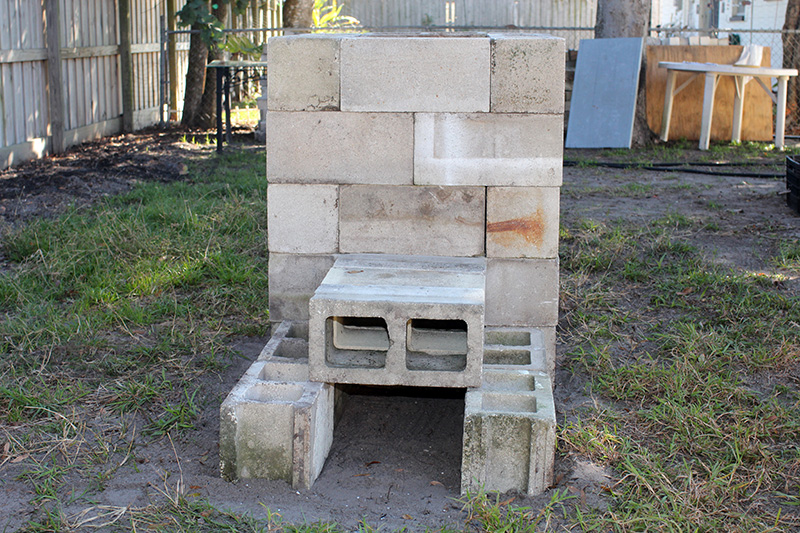
Smoker with attached fire pit
There are only 7 blocks needed to construct the fire pit which is freely attached to the front wall. Any little smoke coming from the connection is negligible as long as there is smoke coming out of the chamber. A wet towel can be placed over the connection where the fire pit and smoker come together. A fire pit may be attached to the smoker with a mortar. As the concrete block is not designed to withhold high temperatures it is to be expected that once in a while one of the fire pit concrete blocks might crack. Obviously, the most practical solution is to replace it with a different one and go on happily smoking like before.
A long stem thermometer can be inserted between blocks or through the top cover. The temperature control and amount of heat generated is obtained by moving burning wood closer or away from the entrance to the smoker. This is a fully functional and easy to operate smoker capable of producing smoked meats of the highest quality and it should not be judged by its looks. Its useful inside space is only 0.7 cubic foot (0.18 cubic meter) smaller than that of a typical metal drum, providing that we could use all of the drum's space for smoking. Resting smokesticks on two separate levels creates enough capacity to smoke about 22 lbs (10 kg) of meats.
Concrete Block Smokehouse-Construction Images
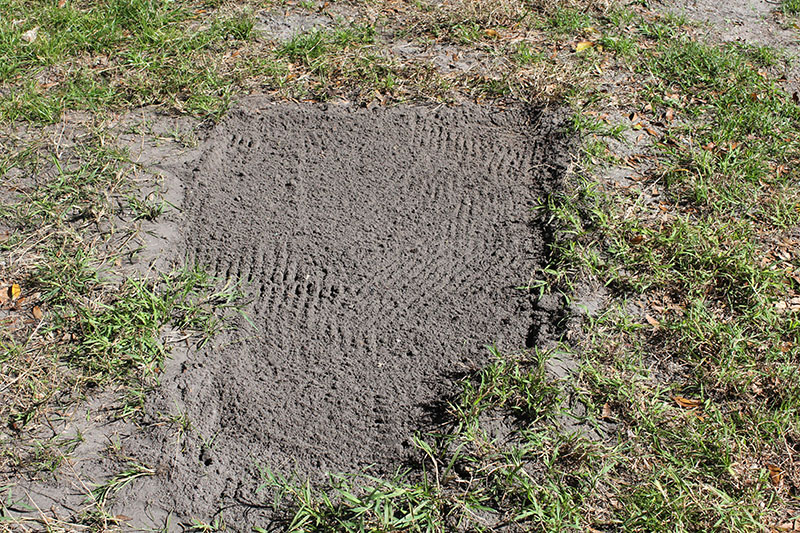
Preparing ground.

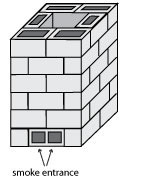
First layer of blocks. Note the smoke entrance.
Second layer of blocks.
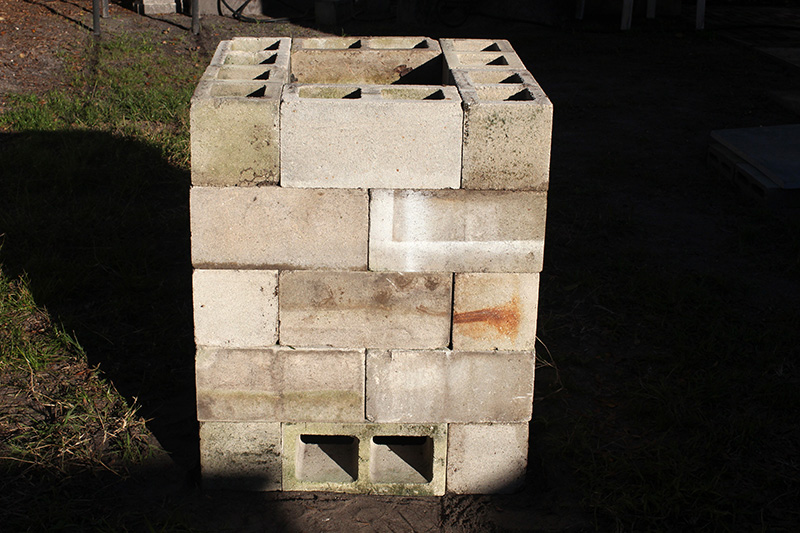
Five levels of blocks, however, more levels can be added.
Front view.
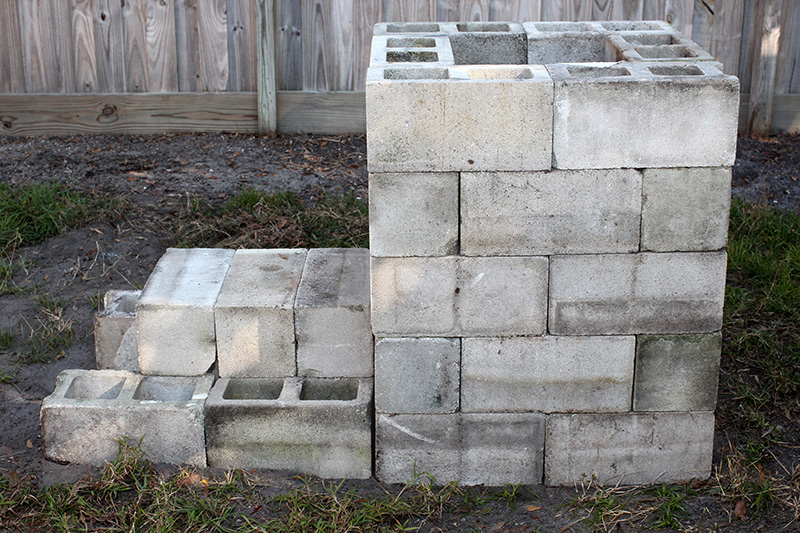
Side view.
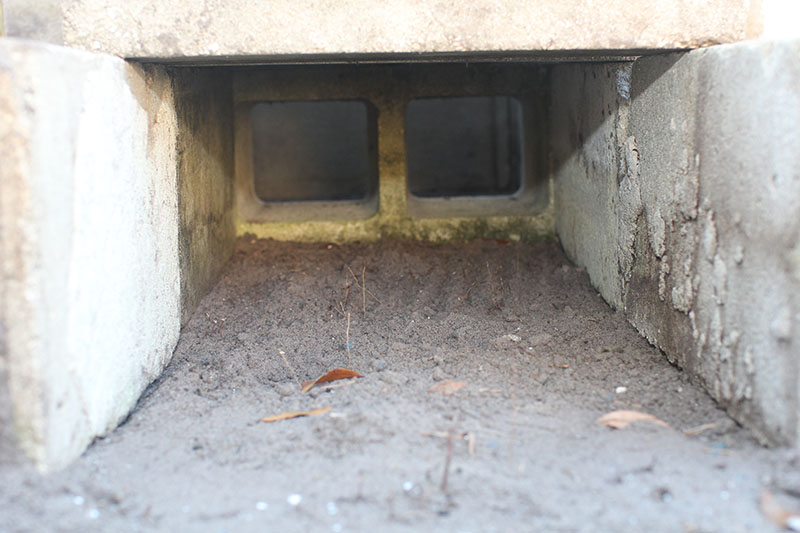
Smoke delivery channel.
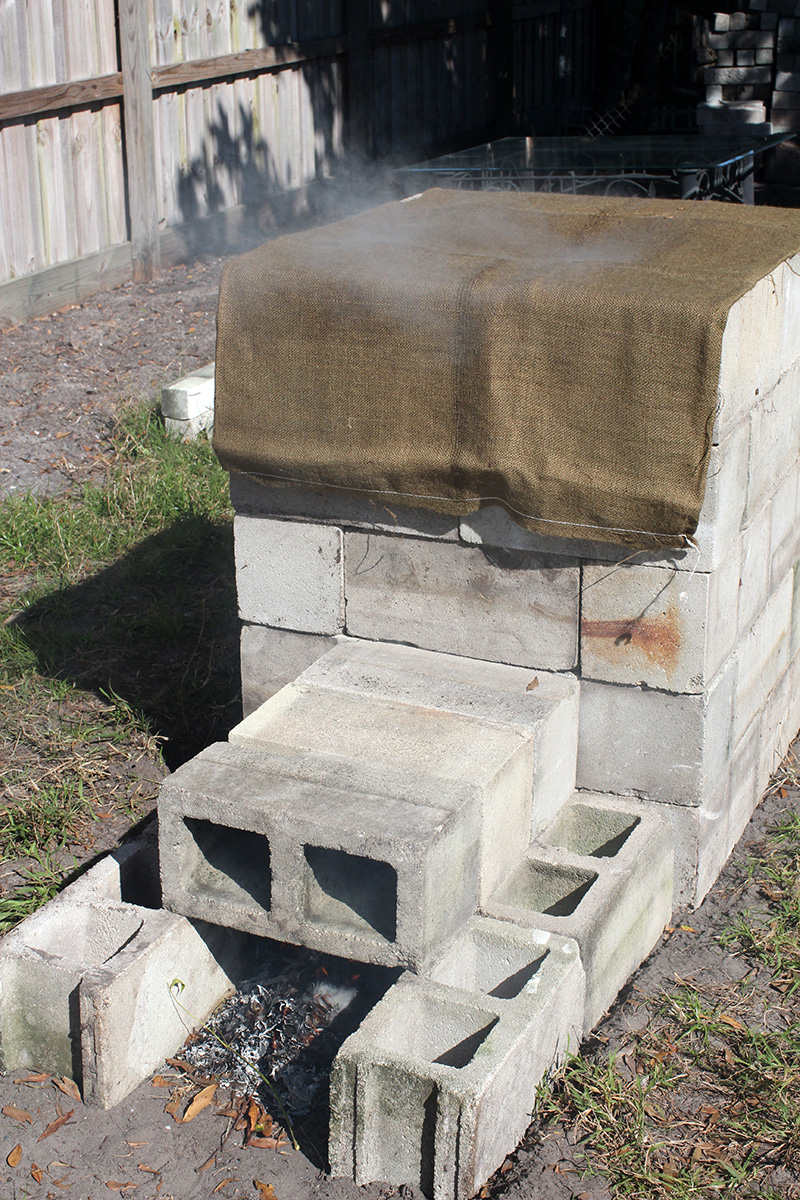
Smoking in progress.
Fire pit can be made longer. A sheet of metal may be placed on top of fire pit instead of concrete blocks.
About Safety
Keep in mind that there is enough draft to start fire when burning wood. The following pictures demonstrate how the fire started when leaves, branches and scraps of wood were disposed off by burning them in fire pit. The burlap bag was left on and caught fire. A good precaution is to have a garden water hose lying nearby. It may save you a fine when fire truck comes by because your unfriendly neighbor reported dense smoke in the neighborhood.
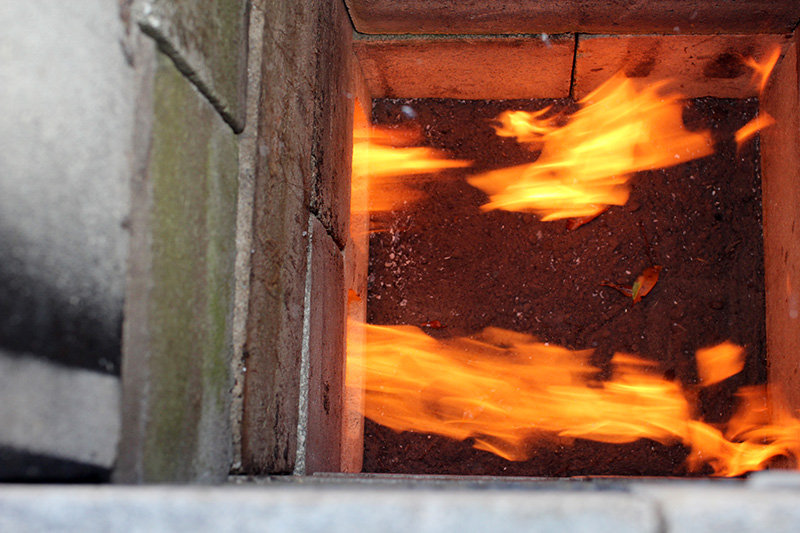
Plenty of natural draft.
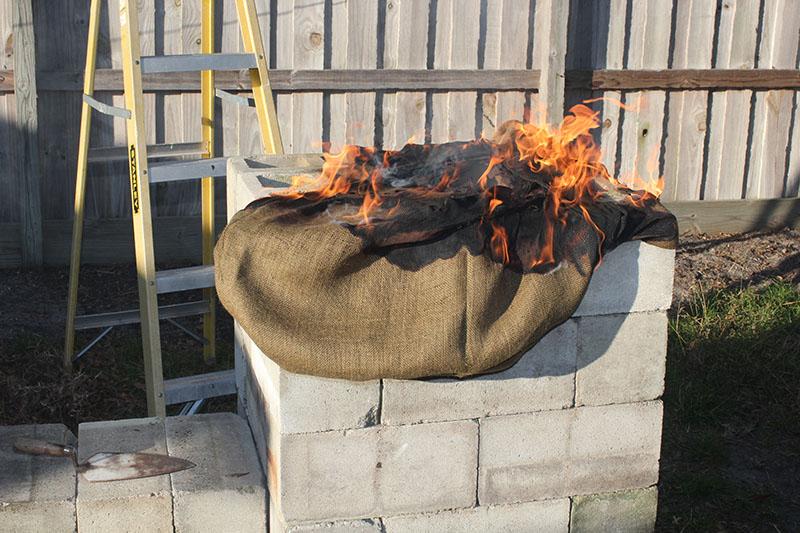
Burlap bag on fire.
Fortunately, the fire started after meats were smoked.
The above information is reprinted with permission from Meat Smoking and Smokehouse Design.